Upgrading your computer with a Solid-State Drive (SSD) can significantly enhance your PC’s performance and user experience. This SSD Upgrade Guide is designed to walk you through the numerous upgrade benefits of switching from traditional Hard Disk Drives (HDDs) to high-speed SSDs. With the capacity to boost speed and efficiency, SSDs are becoming increasingly accessible and affordable options for users looking to revitalize an aging system.
SSDs offer remarkable read and write speeds, with NVMe drives achieving up to 3500 MB/s compared to the maximum of 550 MB/s for SATA drives. Many users notice a dramatic reduction in boot times—between 30% and 70%—simply by making the switch. These drives not only add speed but also come with enhanced durability, consuming up to 50% less power, which can help extend battery life in laptops during intense tasks.
In this guide, you’ll learn how to effectively select and install an SSD, maximizing your computer’s potential and transforming the way you interact with your data.
Why Upgrade to a High-Speed SSD?
Upgrading to a high-speed SSD brings significant enhancements to your computer’s performance. The transition from traditional HDDs to SSDs not only improves speed but also provides a range of other advantages, allowing you to maximize your computing experience.
Benefits of SSD Over HDD
The benefits of SSD upgrades are becoming increasingly apparent. SSDs are built using NAND-based flash memory which provides faster read and write speeds, reduced boot times, and overall increased responsiveness. This technology eliminates the moving parts found in HDDs, making SSDs more resilient against physical damage and improving their lifespan. Unlike HDDs that usually have spinning disks, SSDs utilize static memory, resulting in more reliable operation.
Performance Improvement: Speed and Efficiency
Switching from an HDD to an SSD can lead to remarkable improvements in speed. You can experience performance ups to 10 times faster, allowing for quicker application launches and reduced load times. This performance uplift plays a crucial role in enhancing your productivity and overall experience when using your device. Tasks that once took minutes can often be completed in seconds, making this upgrade a wise investment for both casual users and professionals. The SSD vs HDD performance comparison clearly shows that faster SSDs significantly reduce lag associated with modern operating systems that rely on virtual memory management.
Durability and Reliability of SSDs
When it comes to durability, SSDs have the upper hand over HDDs. The absence of moving parts means SSDs are typically more reliable, making them ideal for users who transport their devices frequently or work in environments where bumps and drops can occur. These durable storage solutions are not only quieter but also consume less power, extending battery life for laptops. Users can feel confident knowing that an SSD will provide a more dependable option for their storage needs.
Understanding SSD Types and Interfaces
When choosing the right SSD, familiarity with the various SSD types and interfaces is essential. Knowing the differences between SATA and NVMe can guide your decision, while understanding form factors ensures compatibility with your devices.
SATA vs NVMe: Key Differences
SATA remains the most prevalent interface for SSDs. It connects via the SATA interface, allowing for speeds up to 550 MB/s, making it suitable for everyday tasks. In contrast, NVMe technology was specifically designed for SSD usage, utilizing the PCIe interface. This allows NVMe SSDs to achieve astonishing speeds, often reaching up to 7,000 MB/s for reading and writing. This speed is critical for tasks requiring rapid data access, such as gaming and video editing. The significant performance difference establishes NVMe as the newer industry standard, particularly for high-performance devices, including gaming consoles and desktops.
Form Factors: 2.5-inch vs M.2
Understanding SSD form factors helps ensure they fit your system’s needs. The 2.5-inch SSD is the most common type, designed to accommodate most desktops and many laptops. These SSDs can achieve speeds up to 550 MB/s read and 520 MB/s write, making them a solid option for general use. M.2 SSDs, compared to a stick of gum, offer a more compact design that connects directly to the motherboard. This form factor facilitates faster data transfer rates and is ideal for slim laptops. Other form factors include the smaller mSATA variant for space-constrained systems and U.2 SSDs, which cater to high-end workstations and server applications.
| SSD Type | Interface | Read Speed | Write Speed |
|---|---|---|---|
| SATA 2.5-inch | SATA III | Up to 550 MB/s | Up to 510 MB/s |
| PCIe NVMe M.2 | PCIe 4.0 | Up to 7,000 MB/s | Up to 7,000 MB/s |
| mSATA | SATA III | Up to 550 MB/s | Up to 520 MB/s |
| U.2 | PCIe | Varies | Varies |
SSD Upgrade Guide: How to Choose the Right SSD
When considering an SSD upgrade, evaluating your needs regarding SSD storage capacity is essential. Different users require varying amounts of space, and understanding your personal or professional requirements will guide you toward the right choice. Here’s what you need to consider when selecting an SSD for your system.
Capacity Considerations for Your Storage Needs
SSDs typically range from 120GB to 2TB. For casual users engaged in web browsing and light applications, a 250GB SSD usually suffices. Gamers and professionals who manage larger files may find themselves needing at least 1TB. Here’s a quick breakdown:
- 120GB: Often too small for general users and becoming less common.
- 250GB: A cost-effective option suitable for light tasks.
- 500GB: Offers a solid balance between price and SSD storage capacity.
- 1TB: Ideal for most modern users, especially gamers.
- 2TB+: Targets power users with extensive storage needs.
Opting for a higher capacity SSD can provide more flexibility and ensure you don’t run out of space soon after upgrading. Prices for larger capacities have become competitive, with 1TB drives available for under $100, making it a wise investment for the future.
SSD Recommendations: Trusted Brands to Consider
When choosing an SSD, prioritizing best SSD brands ensures you receive a reliable product. Renowned names in the industry such as Samsung, Crucial, and Western Digital consistently deliver high-performance SSDs. Alongside brand reputation, pay attention to reliability and warranty. A longer warranty period often signifies greater trust in the product’s durability. Here are some recommended options:
| Brand | Model | Capacity | Warranty | Best For |
|---|---|---|---|---|
| Samsung | 870 Evo | 4TB | 5 years | General users & gamers |
| Crucial | MX500 | 1TB | 5 years | Budget-friendly choice |
| Western Digital | Blue SN570 | 2TB | 5 years | Creative professionals |
In addition to storage capacity and performance, consider your future needs for storage expansion options. Investing in a trusted brand with a favorable warranty adds peace of mind. This approach ensures enhanced performance and lasting reliability for your SSD upgrade.
Installation Guide for Your New SSD
Upgrading to a high-speed SSD can significantly enhance your system’s performance, making the SSD installation procedure a crucial step in modernizing your computer. Before diving into the installation process, take time for proper computer preparation for SSD. This phase not only ensures a seamless upgrade process but also helps safeguard your valuable data throughout the procedure.
Preparing Your Computer for a Smooth Upgrade
The first step in this journey involves backing up your files to prevent any potential data loss. Gather the necessary tools, including a screwdriver, SATA cable (if required), and an enclosure for cloning your current drive. Understanding your existing computer setup, such as the need to disconnect unnecessary components or cables, aids in facilitating the hardware replacement.
Step-by-Step Installation Process
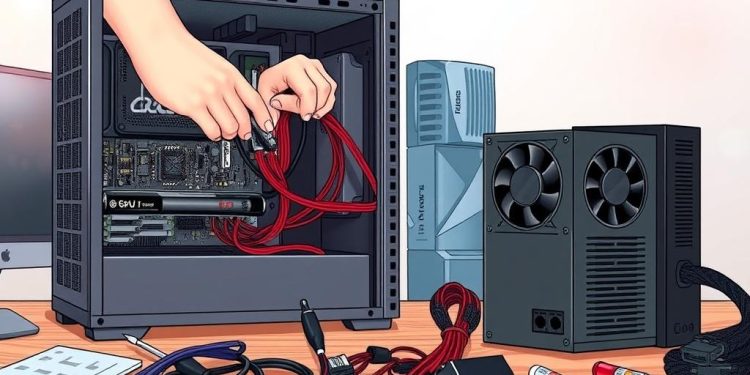
Begin the SSD installation procedure by shutting down your computer and disconnecting all power sources. Remove the casing panel to access the current hard drive. Disconnect it gently and take it out. After that, insert the new SSD into the suitable slot or drive bay. Make sure to connect it securely, then replace the computer’s panel. Once everything is back together, power on your system to ensure it recognizes the new SSD, completing the physical installation process.
| Step | Description |
|---|---|
| 1 | Back up all important files to avoid data loss. |
| 2 | Gather essential tools like screwdriver and SATA cable. |
| 3 | Open the computer casing and locate the existing hard drive. |
| 4 | Disconnect and remove the old hard drive. |
| 5 | Insert the new SSD into the appropriate drive bay. |
| 6 | Securely connect the SSD and replace the casing panel. |
| 7 | Power on the computer and check BIOS for SSD recognition. |
Following these steps will enhance your system’s performance, paving the way for an optimal computing experience.
Optimizing Your SSD for Maximum Performance
When it comes to maximizing the potential of your high-speed SSD, implementing specific SSD optimization techniques can make a substantial difference. By focusing on certain performance tuning methods, you can enhance speed and prolong the lifespan of your drive. This section highlights essential practices, including the TRIM command, AHCI mode adjustments, and power management settings.
Setting Up TRIM and Avoiding Defragmentation
The TRIM command plays a vital role in maintaining SSD performance over time by informing the drive which data blocks are no longer necessary. Verifying that TRIM is enabled is crucial to prevent performance degradation. Unlike traditional HDDs, SSDs do not need defragmentation, and running such a process can even diminish their longevity. Windows 7 and 8 automatically disable the disk defragmentation scheduling for SSDs. It is wise to check your settings and ensure that TRIM is functioning, as untrimmed blocks can lead to a performance drop of up to 30%.
Enabling AHCI for Improved Speed
Enabling AHCI mode in your BIOS settings allows your SSD to operate at its best, taking advantage of advanced features like Native Command Queuing. This configuration can yield performance improvements of around 10-15% compared to using IDE mode, enhancing your system’s response during demanding tasks. If you haven’t already enabled AHCI mode, now is the perfect time to make this adjustment for better efficiency.
Adjusting Power Settings for Efficiency
To ensure your SSD operates efficiently, adjusting the power management settings is essential. Utilizing Windows’ High Performance power plan, especially in desktop setups, can help prevent the SSD from entering low-power states that might hinder its responsiveness during workloads. By making these adjustments, you promote not only better performance but also a more stable and reliable computing experience.
Conclusion
Upgrading to a high-speed SSD is a pivotal decision that can profoundly enhance your computer’s performance and efficiency. In contrast to traditional hard drives, the speed of an SSD can reduce boot times to mere seconds, drastically improving your daily computing experience. The immediate access and reduced lag for applications lead to improved performance, making every task—whether gaming, editing, or multitasking—more seamless and enjoyable.
Furthermore, the reliability of SSDs exceeds that of HDDs because they lack moving parts, resulting in a significantly lower failure rate. This durability ensures your important data is more secure. Plus, with SSD upgrades, you’ll discover lower power consumption that not only reduces your energy bills but also lessens heat generation, contributing to sustained computer efficiency.
As you embrace the shift to an SSD, you’ll witness a marked transformation in how you interact with your device, significantly enhancing your computing experience. Make the transition with thoughtful consideration of capacity and performance to maximize this investment, and relish in the newfound speed and reliability that comes with using an SSD.

