
When you embark on the journey of CPU installation troubleshooting, it’s essential to understand the potential obstacles you may face. Properly installing your CPU is vital for achieving optimal computer performance. This installation guide will help you identify common issues that may arise during the installation process and address them effectively. By familiarizing yourself with compatibility concerns and essential hardware setup requirements, you can enhance your troubleshooting skills. This article aims to provide you with insightful solutions, setting you on the right path to successfully installing your CPU.
Understanding CPU Installation Issues
CPU installation issues can arise from various factors, leading to complications during installation or subsequent performance problems. Recognizing the common causes and symptoms of failure will help you address any issues efficiently. This insight makes the installation process smoother and enhances your system’s overall stability.
Common Causes of CPU Installation Problems
Several common causes can lead to CPU installation problems. Some of these include:
- Improper seating of the processor, which can prevent the CPU from making proper contact with the motherboard
- Insufficient thermal paste application, resulting in poor heat transfer and potential overheating
- Issues with the motherboard, such as outdated firmware or hardware incompatibility
- Blocked air vents causing elevated temperatures, contributing to installation issues and performance degradation
Symptoms Indicating a CPU Installation Issue
Identifying the symptoms of failure will allow you to respond quickly to CPU-related problems. Common symptoms that indicate installation issues include:
- Frequent system crashes or blue screens of death (BSOD), which often point to hardware or driver conflicts
- Failure to boot up, signaling potential CPU or motherboard detection issues
- Unexpected shutdowns, typically resulting from overheating or improper CPU seating
- Excessively loud fan noise, often a sign that the processor is overheating
By understanding these common causes and symptoms of failure, you can troubleshoot effectively, enhancing your CPU installation experience.
| Common Causes | Symptoms of Failure |
|---|---|
| Improper seating | Frequent crashes or BSOD |
| Insufficient thermal paste | Unexpected shutdowns |
| Motherboard issues | Failure to boot |
| Blocked air vents | Excessive fan noise |
CPU Compatibility Issues
Understanding CPU compatibility with your motherboard is essential for a successful build. Many factors influence this compatibility, from socket types to chipset support. Without ensuring a proper match, you may encounter issues that hinder system performance or lead to complete failure.
How to Check Processor Compatibility with Your Motherboard
To verify CPU compatibility, you need to examine both the CPU and motherboard specifications. Here are some key steps you can take:
- Identify the socket type of your CPU (e.g., LGA, PGA) and ensure it matches your motherboard’s socket.
- Check the motherboard’s chipset to confirm it supports the specific processor model.
- Review power requirements. If you are using a high-performance CPU, ensure that the motherboard’s Voltage Regulator Module (VRM) can provide adequate power.
- Visit the motherboard manufacturer’s website to see if a BIOS update is available that adds support for newer CPUs.
Being diligent in these checks can prevent system instability, random crashes, or even failure to boot, which could potentially harm your hardware.
Impact of Unsupported CPUs on Performance
Using an unsupported CPU can lead to several critical issues. Incompatibility may result in the following:
- Decreased performance due to inadequate chipset support.
- System instability manifested in random crashes.
- Boot failures that prevent you from accessing your operating system.
- Physical damage to components from incorrect installation or voltage mismatches.
It’s vital to recognize that every CPU and motherboard combo has unique requirements shaped by architecture and technology advancements. Failing to adhere to these specifications compromises overall system reliability and capability.
| Compatibility Aspect | Potential Issues |
|---|---|
| Socket Type | Incorrect installation, physical damage |
| Chipset Support | Boot failures, performance limitations |
| Power Requirements | System instability, crashes |
| BIOS Version | Inability to utilize newer CPUs |
Addressing these compatibility concerns is vital for constructing a reliable and efficient computer system, particularly as technology evolves. By ensuring proper CPU and motherboard harmony, you can unlock the full potential of your hardware.
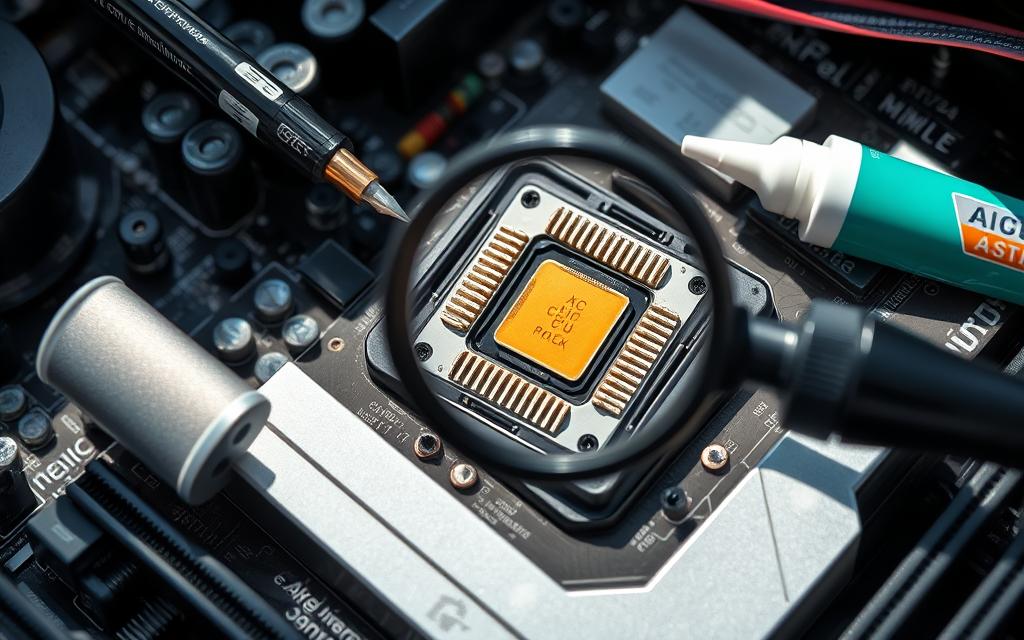
Essential Hardware Setup for Successful CPU Installation
To achieve a successful CPU installation, having the right hardware setup and installation tools is vital. Ensuring you have the necessary components on hand can make the process smoother and help prevent issues down the line. Proper motherboard preparation sets the stage for a seamless installation experience.
Required Tools and Components for Installation
Before diving into the CPU installation process, gather the following installation tools and components. Each item plays a crucial role in achieving a successful setup:
- Screwdriver set (preferably magnetic)
- Thermal paste
- Anti-static wrist strap
- Clean microfiber cloth
- Isopropyl alcohol (for cleaning surfaces)
- Instruction manual for your motherboard
Steps to Prepare Your Motherboard for a New CPU
Careful motherboard preparation is essential before installing your new processor. Follow these steps to ensure everything is ready:
- Power down your system and unplug all cables.
- Ground yourself using the anti-static wrist strap to prevent electrostatic discharge.
- Remove the motherboard from the case or ensure it is accessible in the setup area.
- Clean the CPU socket gently with a microfiber cloth and isopropyl alcohol to remove any old thermal paste.
- Check for obstructions in the socket area, ensuring there are no bent pins (for AMD PGA sockets) or debris.
- If necessary, install the CPU cooler bracket as per the motherboard guide.
Implementing these measures during your hardware setup makes the installation process smoother, minimizes risks, and ensures a successful CPU integration into your system.
CPU Installation Troubleshooting
Successfully installing a new CPU can sometimes lead to unexpected challenges. Recognizing how to perform installation troubleshooting effectively can assist in identifying and fixing problems that arise. Below are common issues encountered post-installation, along with steps you can take to resolve them.
Identifying and Fixing Common Installation Problems
Booting issues frequently occur after upgrading to a new CPU, often resulting from motherboard complications. Some typical problems include:
- Bent or damaged pins and sockets that can hinder functionality.
- Inadequate power supply for new components demanding more energy.
- Outdated BIOS versions, which may prevent recognition of the new CPU.
To tackle these installation challenges, consider the following troubleshooting methods:
- Reconnect all power cables, ensuring secure connections.
- Test the CPU by installing it in an alternate PC.
- Reset the CMOS to clear any previous settings that might interfere.
- Adjust BIOS settings, switching from UEFI to Legacy or CSM if needed.
- Update your BIOS from a USB drive with the latest version obtained online.
Utilizing these techniques can significantly enhance the chances of resolving booting problems related to CPU installation.
How to Diagnose Motherboard Issues Affecting CPU Performance
Diagnosing motherboard issues is essential when troubleshooting installation problems. If your CPU functions on another system but not on your primary machine, it may indicate a fault in the motherboard settings. Here are some considerations:
- Check for proper alignment in CPU seating and ensure the CPU lever is securely closed.
- Confirm that the thermal paste has been applied correctly, as improper application can lead to overheating.
- Examine the power supply wattage against the requirements of the new CPU.
A thorough inspection can reveal whether the motherboard is operational and compatible with the newly installed CPU. Taking the steps outlined above can lead to successful diagnosis and resolution of CPU-related performance issues.
By understanding common pitfalls associated with CPU installation and implementing effective troubleshooting steps, you can optimize your PC’s performance and minimize downtime due to unexpected failures.
Ensuring Proper CPU Mounting and Seating
Ensuring the correct CPU mounting and processor seating is critical for optimal performance and system stability. Proper techniques in securing the processor can greatly reduce the risk of issues down the line. Following the right steps not only achieves a secure installation but also enhances the lifespan of your components.
Techniques for Securing the Processor Correctly
Starting with a clean and well-lit workspace is essential. You should install the CPU on the motherboard outside of the PC case to provide ample room for movement. Taking precautions against static electricity is crucial, so using an anti-static wrist strap will help prevent damage during installation.
- Handle the CPU carefully to avoid bending pins or applying excessive pressure.
- Check for any pre-applied thermal paste; if absent, apply a small amount evenly to the center of the CPU.
- Place the cooler onto the CPU, ensuring it aligns with mounting brackets properly.
- Tighten the cooler securely but avoid overtightening to prevent damage.
- Connect the cooler’s power cable to the designated fan header on the motherboard.
Recognizing Signs of Poor CPU Seating
Identifying poor processor seating early can save you from significant headaches. If the CPU is not seated correctly, signs of malfunction will often manifest. Watch for the following indicators:
- Frequent system crashes or instability.
- Unusually high temperatures during operation.
- Failure to boot or prolonged POST (Power-On Self-Test) times.
In conclusion, paying attention to CPU mounting and processor seating techniques significantly contributes to a secure installation. Utilizing thermal paste appropriately and recognizing early signs of poor seating can ensure both performance and longevity for your system.
| Technique | Description |
|---|---|
| Clean Workspace | Ensure a clutter-free area for proper installation. |
| Static Precaution | Wear an anti-static wrist strap to avoid electrostatic discharge. |
| Thermal Paste | Apply if not pre-applied to ensure proper heat transfer. |
| Secure Cooler | Tighten the cooler without excessive force to avoid damaging components. |
| Check Connections | Ensure all cables, especially the cooler’s power, are properly connected. |
Conclusion
In summary, effectively addressing CPU installation troubleshooting is essential for ensuring optimal system performance. By understanding potential issues and maintaining compatibility between your CPU and motherboard, you significantly reduce the risk of common problems. It’s important to focus on proper installation techniques and regular maintenance, including monitoring temperatures and cleaning dust accumulation, to keep your CPU running smoothly.
Utilizing the solutions discussed in this article, such as replacing old thermal paste and ensuring adequate cooling, can lead to profound performance optimization. By being proactive in managing your CPU setup, you not only enhance your computer’s efficiency but also extend the lifespan of your components. Understanding how to navigate these challenges is a key step in achieving a reliable and high-performing machine.
Remember that your CPU is the heart of your system; take the time to follow these practices and invest in your computing experience. By embracing careful usage and troubleshooting techniques, you pave the way for a seamless and productive workflow, all while harnessing the full potential of your hardware.


